I thought it would be easy. But is anything really easy?
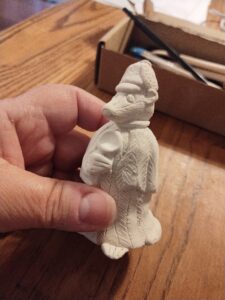
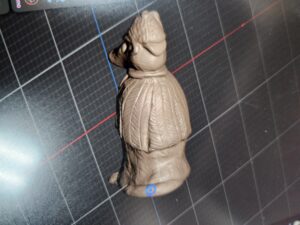
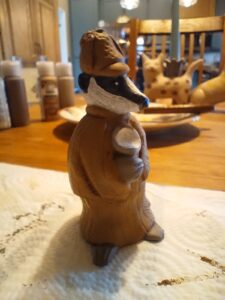
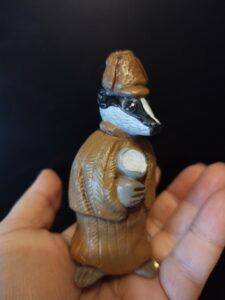
I started out creating with good ole Sculpey a little Sherlockian figurine of a cute animal in the deerstalker and Ulster coat. At first I made a mouse, but there were too many comparisons to The Great Mouse Detective, so I thought to maybe make a cat. But then the “DUH!” moment hit me. One of my original characters for my An Irregular Detective Mystery series, a former Baker Street Irregular, those street kids Sherlock Holmes hired to be his eyes and ears in London, is named Tim Badger. Badger. BADGER! So I changed tack and made a little Badger fellow. I made many. This one was too squat. This one’s head is too big. And so is this one. I made about five until I was pleased with it. And then I researched how to make a mold because I wanted to produce these in resin in order to paint them.
Watched a few YouTube videos and this one in particular seemed really helpful. I took notes. And then I made my partner in crime Craig (my husband) watch the video. Since he knew something about mold-making back in the day but before these more flexible silicone ones, I knew he could be the go-to guy.
We picked a day to finally do it. I think there was some cavalier moves without really measuring the two-part materials to make the silicone and that they weren’t quite as equal as they should have been.
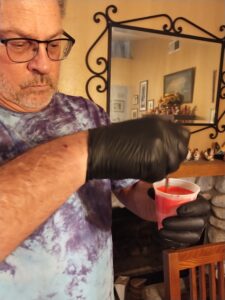
But we set it up just like the video with taping down the contact paper, sticky side up on which the original was going to be cast. Then, using a plastic cup (not what the video said) and using tons of hot glue to seal it.
He mixed, he poured, and then quickly had to mix more and pour more.
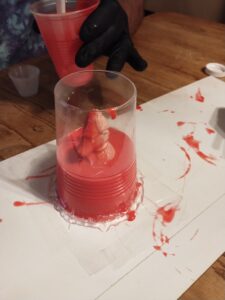
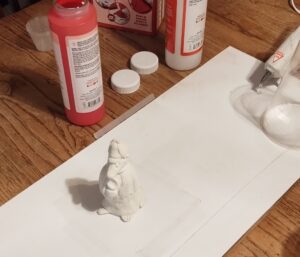
It looked pretty keen. Bright red. Seemed a bit sticky after the allotted time, so we decided to leave it overnight. Finally, I began the unveiling the next morning. First problem arose when I tried to get the mold off of the sticky contact paper. It wouldn’t give. I ended up ruining the tail when I tried to cut it off. And the second problem arose when I tried to get the rest of the mold off. The head left the shoulders and staying way down in there until I really flexed the thing to get it out.
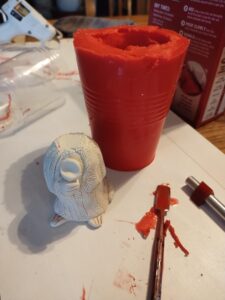
Headless. The original. And I didn’t trust this mold. And at $35 bucks a pop for the kit, and some $14 for the ceramic resin to cast them one at a time, I was beginning to see how this would add up.
And then I thought of 3D printing.
I thought it might be expensive. But before I ruled it out I had to talk to someone who knew what they were doing. I looked around for someone local. I like to used local folks, people with cottage industries in their garage. They could use the work and I am helping my community. So I found the friendliest guy alive, Chunks3D in Riverside, CA. (He ships to anywhere, by the way). We corresponded by email for a bit, me asking about the process, the time, and the cost, and he responding with all I needed to get it done. Now it sounded doable.
I got the master model to him and he took a lot of pictures of the process which I am sharing here.
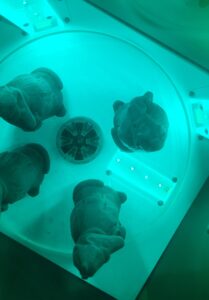
I didn’t get to watch the process as it takes an hour, but as I understand it, this particular printer prints not from a nozzle from the top to create from the bottom up in those stair-step things (which definitely would not work for me), but instead it comes up from the bottom.
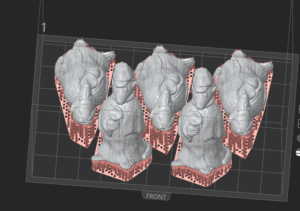
As soon as the liquid resin hits the UV light, it’s hard. And so it rises slowly like a phoenix. It has these threads called supports that afterward are broken off and sanded away. No stair-steps like a mini-ziggurat.
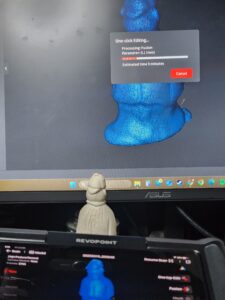
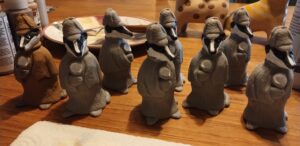
He scans it first and he saw how it lost detail. So he scanned it again at a different resolution to keep the etched herringbone pattern I put on the Ulster. We made it hollow to save money on the resin and voila! During the printing process, one lost its supports and came out wonky, so he printed again. He did five at a time at first, so I ended up with eight instead of five. At least for this run. I can see doing this again, because since I already paid for the scan, he’s got that saved and all I pay for is the time on the printer and for the resin.
The costs break down like this:
custom 3d print $17.51 ($4.25/hr) × 4.12 hr
Resin used in ml $15.76 ($0.08/mL) × 197 mL
Custom 3d model $30.00
With tax it came to about $67 for scanning and 8 figurines. And the next ones I do won’t include the $30 for scanning, so win-win.
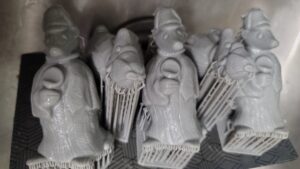
Then, of course, I had to paint them and give them a final matte varnish coat. It started to look like a little army. A confused little army, but nonetheless.
I won’t be selling them. They are exclusively designed as giveaways. You’ll have a chance to win one of these if you go to my Sherlockian book events or the upcoming YouTube book launch on Saturday, August 16 at 2pm Pacific.
Discover more from Jeri Westerson
Subscribe to get the latest posts sent to your email.